Have you been staring at your aging pool and wondering if it is time to give it a makeover? More than a gut feeling, wanting a new feature or look, there are some structural items that may require some work as
well. We recently detailed the reasons to consider a pool remodel or pool resurfacing. If you notice any of the following, then it is probably time to give a Jacksonville pool company a call.
– Discoloration
– Chips and cracks
– Pitting
– Age of the pool
– Embarrassment and low motivation to host pool parties 😉
If you have decided it’s time to resurface your swimming pool, it is important to understand what that project will entail and the timeline to expect.
One of the most frequently asked questions we receive at the office is about the pool refinishing process. That isn’t just homeowners asking, we also have associations and resorts asking about their commercial projects as well. People want to know how long it takes, how much it will cost, and the amount of work that will go into the pool resurfacing. While concrete pools come in many shapes and sizes, the general process for refinishing the interior surface of a pool is the same when working with SurfSide Pools & Spas — the only thing that changes is the length of time it may take.
So, if you are trying to decide on a pool resurfacing project, we thought it would be helpful to detail our process and timeline so you can have an idea of exactly what you are getting into .
STEP ONE – Pressure Test
The first step will be a pressure test on your pool. During this step, our team thoroughly checks for any leaks in pool/equipment so if there are any outstanding issues they can be addressed before we move forward with the remodel.
Timeline: The results from this test can take 1-2 days. Once we get the “O.K.” that the pool is leak-free, we move forward to the next step.
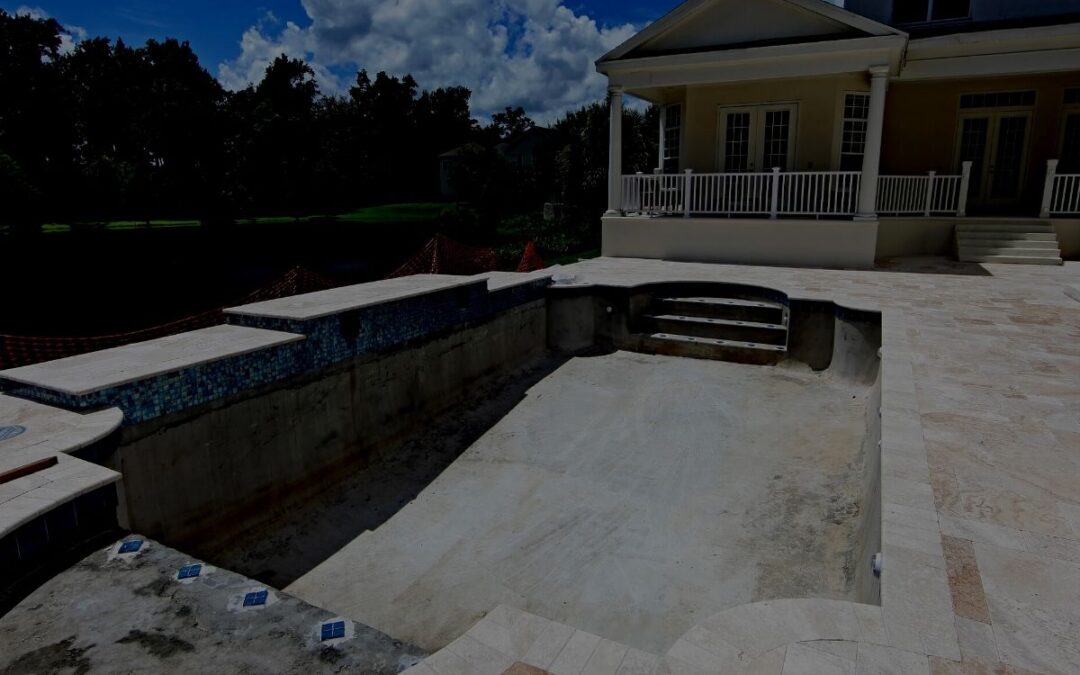
STEP TWO – Drain and Prep
During this step, our prep crew drains the pool and removes the hydrostatic plug and/or drill small holes in the bottom surface to prevent the pool shell from popping out of the ground – really!. A sump pump may be placed in the deep end to remove any excess groundwater. Do not be surprised if you notice a few inches dirty water in the bottom of your pool. This is normal and will not harm the pool.
Once the pool is drained, our team begins the prep work which, depending on the scope of a job, could entail removing old tile, filing voids in the tile line with Pool Brite and waterproofing the surface. Any repairs that are needed after the pressure test will be addressed at this point as well, with homeowner’s approval. If new decking is in the scope of work, we also cut back the cantilever and prep the area for new coping.
Timeline: The entire drain and prep process can take 4-5 days, or longer for more in-depth jobs.
STEP THREE – Install New Tile
Once the pool is completely prepped, our tile team will do their magic! A new waterline tile will be carefully installed and grouted.
Timeline: Because of the delicacy of this step, the installation of new tile can take up to a week to complete.
STEP FOUR – Install or Resurface Decking
Decking is up next! If a client has elected to have the existing concrete deck resurfaced, it will be done at this time. If they are having a new paver decking installed, our decking team will install the new material at this time, including the coping. If there is a screen enclosure, any repairs or adjustments to the existing screen will be made once the decking is complete.
Timeline: Decking will take approximately one week to complete.
STEP FIVE – Apply Interior Surface
Finally, we are ready to shoot the interior. This is a very labor-intensive process. Our interior team first cuts around the fittings, light niches and mains drains and chisel out any hollow points. Next, they will apply Bond Kote to the entire surface of the pool and/or spa which will help the new interior finish adhere to the underlying layer of the pool and ensure a more uniform texture and surface.
Once the Bond Kote is applied, the new interior finish is ready to be put on. If a clients has elected to add any tile markers or borders to the steps and/or benches, they will be set during this stage. For the final step of this process, our crew water or acid washes (depending on the interior material selection) the entire surface of the pool to ensure the aggregates are smooth and exposed. A temporary slurry pit will be placed near our access point to the backyard during water/acid wash and will be removed approximately 2-3 days after interior is applied.
Timeline: This entire process will take approximately 1 week to complete.
Not so fast…!
Now the pool is finally ready to be filled with water! However, it’s not quite ready for you to take a dive in just yet. There are some final clean-up and start-up processes to check off before the newly resurfaced pool is ready for you to Float Happy™.